Composting at Home: A Beginner's Guide
Composting works because of biology, not magic. Given the right inputs and a bit of attention, a pile of yard waste and kitchen scraps becomes soil — black, crumbly, and worth more than anything you can buy in a bag. This guide walks through what to actually do: how to set up a pile, what to feed it, what to leave out, and how to fix it when something goes wrong.
Why compost?
A few reasons that actually hold up.
Soil quality you can’t buy. Bagged “compost” from the garden center is variable. Some of it is good. A lot of it is partially-rotted bark with sand mixed in. Compost you make is finished, you know what went in, and the microbial life in it is alive — the bagged stuff often isn’t.
Waste reduction. A normal household generates 20-40% of its trash from food waste and yard debris that’s compostable. Diverting that out of the trash means smaller bins, fewer pickups, less methane in landfills.
Money, eventually. A 40-lb bag of compost is $8-15 at retail. A reasonable backyard pile produces several hundred pounds of finished compost per year. The math closes pretty quickly.
Closes the loop. If you garden or keep chickens or both, compost is the connective tissue. Garden trimmings go in. Chicken bedding goes in. Finished compost goes back to the garden. The system feeds itself.
Hot vs cold composting
Two approaches, and the choice is mostly about how much effort you want to put in.
Cold composting. Pile material as you generate it. Don’t worry too much about ratios. Don’t turn the pile. Wait 6-12 months. You’ll get compost. It’s the lowest-effort approach and it works.
The catch with cold composting: the pile never gets hot enough to kill weed seeds, pathogens, or pest larvae. Anything that goes in alive can come out alive. Don’t add diseased plants, weed seed heads, or anything you wouldn’t want to spread back to your garden.
Hot composting. Build a pile of the right size (minimum 3’×3’×3’), with the right ratio of nitrogen-rich “greens” to carbon-rich “browns” (roughly 1:3 by volume), keep it moist, and turn it every 1-2 weeks. The pile will heat to 130-160°F internally within a few days, finish in 4-8 weeks, and kill weed seeds and most pathogens in the process.
Hot composting requires more setup energy and ongoing turning, but the speed difference is significant — six weeks vs. six months — and the finished product is more uniform.
For most people starting out, cold composting is the right answer. You’ll keep doing it because the activation energy is low. Hot composting is better once you have enough material flow to keep a large pile fed.
What goes in: greens, browns, and ratios
The “greens and browns” thing isn’t about color. It’s about nitrogen vs carbon.
Greens (nitrogen). Fresh, wet, soft. They break down fast and provide nitrogen for the microbes.
- Kitchen scraps: vegetable peels, fruit cores, coffee grounds and filters, tea bags, eggshells
- Grass clippings (in moderation — they mat down)
- Fresh garden trimmings, deadheaded flowers
- Manure from herbivores: chicken, rabbit, cow, horse
- Spent brewing grains if you brew
Browns (carbon). Dry, brittle, slow to break down. They provide structure, air gaps, and carbon.
- Dry leaves
- Straw, hay
- Cardboard (shredded or torn into pieces)
- Brown paper bags
- Wood chips and sawdust (untreated)
- Pine needles (in small amounts — they’re acidic)
- Twigs and small branches
The ratio. Target 2-3 parts brown to 1 part green by volume. Hot pile or cold, this matters. Too much green → wet, smelly, anaerobic. Too much brown → dry, slow, never finishes.
The simplest way to manage this: keep a stockpile of browns nearby (a leaf pile, a bag of cardboard). Whenever you add a layer of kitchen scraps, cover it with a layer of browns. The pile self-balances if you do this consistently.
What to avoid
A short list of things that don’t belong in a backyard compost pile.
- Meat, fish, dairy, oily foods. They smell, attract pests (raccoons, rats, dogs), and don’t break down cleanly at backyard temperatures. Industrial composting handles them; you can’t.
- Pet waste from dogs and cats. Can harbor pathogens (toxoplasmosis, roundworm) that survive normal composting. Don’t use this on a food garden.
- Diseased plants. Cold piles don’t get hot enough to kill plant pathogens. You’ll just spread the disease back. Throw these out instead.
- Weeds with mature seed heads. Same reason — seeds survive in cold piles. Seed heads in the trash; the rest of the weed in the pile is fine.
- Treated grass clippings. If you or your neighbor sprays the lawn with broadleaf herbicide, those clippings can carry persistent herbicide residues that kill broadleaf plants in your garden. Wait 4-6 weeks after a spray before composting clippings.
- Glossy paper, receipts, sticker labels. Glossy paper has plastic in the coating. Thermal receipts contain BPA. Don’t add either.
- “Compostable” bioplastics. PLA cups, “compostable” packaging — most of it needs industrial composting (sustained 140°F+) to actually break down. In a backyard pile they sit there. Treat them as trash.
- Charcoal ash and treated wood. Coal ash and pressure-treated wood contain heavy metals or arsenic. Skip both.
Things people worry about that are actually fine in moderation: citrus peels, onion and garlic skins, coffee grounds (acidic alone but neutral in a balanced pile), eggshells (calcium — great), and small amounts of bread or cooked grains.
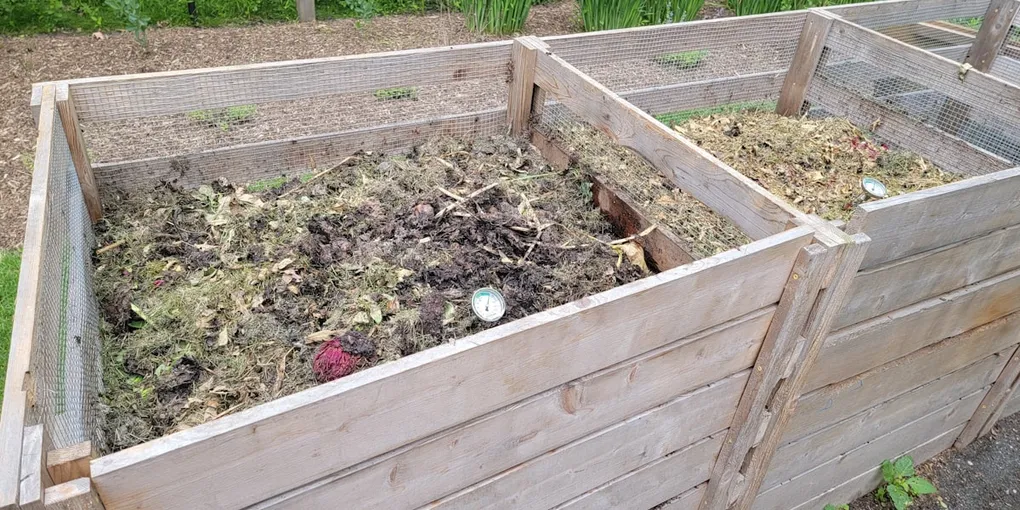
Bin vs pile vs tumbler
Three main approaches.
Open pile. Free, traditional. You just heap material in a corner of the yard. Pros: no cost, easy to add to, easy to expand. Cons: looks unkempt, scatters, dries out faster in sun, harder to turn, attracts curious wildlife.
Good for: large yards, rural settings, people with high material flow.
Compost bin. Wire, wood, or plastic — anything that contains the pile while still letting air in. Pros: tidier, easier to keep critters out, can be moved or stacked. Cons: costs $50-300, can dry out or get too wet depending on design, harder to turn than a pile.
Good for: suburban yards, anyone who wants neighbors not to complain.
Tumbler. A drum on a stand that you crank to mix. Pros: fast (4-8 weeks if managed), tidy, easy to mix, pest-proof, small footprint. Cons: limited capacity (usually 50-100 gallons), $80-300, requires you to wait for one batch to finish before starting the next, doesn’t handle bulky yard waste well.
Good for: small yards, people without much yard waste, people who don’t want to look at a pile.
If you’re just starting and don’t know your flow yet, a wire-ring bin (a piece of welded wire fencing rolled into a ring) costs $20-30 and works well. You can always upgrade later.
Building a simple compost bin (under $50)
A few cheap designs that work.
Wire ring bin. Take a 10-foot length of welded wire fencing (2”×4” mesh, 36-48” tall). Roll it into a cylinder, secure the ends with zip ties or wire. Set it on level ground. Done. ~$25 in materials. Capacity: ~30 cubic feet. You can lift the cylinder off the pile to turn — pull the wire up, set it next to the pile, fork the material back in.
Pallet bin. Three or four pallets, wired together at the corners. Open front so you can shovel in and out. ~$0 in materials if you can find free pallets (Craigslist, behind retail stores — ask first). Solid, capacious, looks like a homestead.
Two-bin system. Two pallet bins side by side, sharing a wall. Add to bin one until it’s full; let it finish while you start bin two. Turn bin one’s material into bin two when you turn. Continuous flow of finished compost without waiting on a single pile. ~$0-50 in materials.
Cinder block bin. Two courses of stacked cinder blocks in a U shape. Heavy, permanent, neat. ~$40-60 in materials. Good if you want something that won’t move.
Whatever you build, two principles: airflow on the sides (so the pile breathes) and access from one side (so you can shovel in and out without dismantling it).
Daily and weekly routine
Composting is more “occasional habit” than “daily chore.” Realistic routine for most households:
Daily-ish. Empty your kitchen scrap bucket whenever it’s full. A 1-gallon countertop bucket holds about 3-4 days of scraps for a family of four. Carry it out, dump it on the pile, cover with a layer of browns from your stockpile, walk away.
Weekly. Check the pile’s moisture. Squeeze a handful — it should feel like a wrung-out sponge. Too dry: add water and turn. Too wet: add browns and turn. Mostly: leave it alone if it looks fine.
Every 1-2 weeks (hot pile only). Turn the pile. A pitchfork is faster than a shovel. Take material from the outside of the pile and move it to the middle. The goal is to expose unfinished material to the hot, active center.
Monthly. Spot-check for problems: smell, pests, slow progress. If the pile’s working, you’ll see it shrinking as material breaks down.
That’s it. The pile does the work; you mostly stay out of its way.
Troubleshooting
Things that go wrong and how to fix them.
Pile smells bad (ammonia or rotten). Too much green, too wet, not enough air. Fix: add browns (dry leaves, cardboard, straw), turn the pile to introduce air. Smell resolves in a day or two.
Pile isn’t breaking down. Could be several things:
- Too dry → add water until it feels like a wrung-out sponge
- Too much brown, not enough green → add greens (grass clippings, kitchen scraps)
- Pile too small → must be at least 3’×3’×3’ to retain heat
- Material too coarse → chop or shred larger pieces
Pile attracts pests. Almost always means meat, dairy, or oily food made it in. Or food scraps weren’t covered with browns. Bury scraps in the middle, cover with browns immediately, and switch to a closed bin if rats are an issue.
Slimy or matted layer. Usually grass clippings or wet leaves clumped together. Pull them apart, mix with browns, and add to the pile in thinner layers next time.
Maggots or flies. Not a disaster — black soldier fly larvae are actually beneficial composters. But it usually means exposed food scraps. Cover with browns, accept some bugs, move on.
Pile dries out fast. Common in dry climates or full sun. Move the pile to shade if you can, cover it with a tarp (with vents), or just water it weekly when you check.
Steaming pile that suddenly stops heating. Means it ran out of nitrogen or oxygen. Turn it, add a layer of fresh greens, water if dry. It’ll restart.
When is it done?
Finished compost looks, smells, and feels like dark, crumbly soil. Original materials should no longer be recognizable — no whole leaves, no recognizable food scraps, no chunks of cardboard.
Timeline: 4-8 weeks for a well-managed hot pile, 6-12 months for a cold pile. Faster in summer; slower in winter (microbes slow down in cold weather).
Two practical tests:
- Sniff test. Finished compost smells earthy, slightly sweet. If it still smells like the food or yard waste that went in, it’s not done.
- Squeeze test. Squeeze a handful. It should feel like loose, damp soil that crumbles when you open your hand.
When the bulk of the pile is finished but you can see some unfinished chunks, sift the compost through 1/2” hardware cloth. The fines go to the garden; the chunks go back to the next pile to finish.
How to use finished compost
A few of the highest-value uses, in order of return.
Garden bed amendment. Work 1-3 inches of compost into the top 6-8 inches of your beds in spring. This is the single best thing you can do for vegetable garden soil — adds nutrients, improves structure, feeds soil life.
Top-dressing. Spread 1-2 inches around the base of perennials, fruit trees, and berry bushes once or twice a year. Don’t pile it against trunks. Earthworms and rain pull the nutrients down.
Potting soil amendment. Mix 1 part compost into 3 parts potting soil for containers. Don’t use straight compost in pots — it stays too wet.
Lawn top-dressing. A thin layer (1/4 to 1/2 inch) raked into a lawn in fall improves soil structure and reduces fertilizer needs. Sift first.
Compost tea. Soak a shovelful of compost in a 5-gallon bucket of water for 24-48 hours, strain, dilute 1:10, spray on leaves or pour at the roots. A mild liquid feed.
The thing nobody tells you: you will always need more compost than you make. Production scales to the size of your yard. Use it where it counts most — vegetable beds, fruit trees, struggling plants — and let everything else fend for itself.
Closing
Composting at home costs almost nothing to start, almost nothing to keep going, and produces a soil amendment that’s better than anything you can buy. The hard part isn’t building the pile. It’s the habit of carrying scraps out to it every couple of days — and once that’s habit, the rest follows.
If you also keep chickens, the loop tightens further. The bedding from a coop cleanout is one of the best inputs a compost pile can get — pre-mixed nitrogen and carbon, ready to break down. Two systems feeding each other.